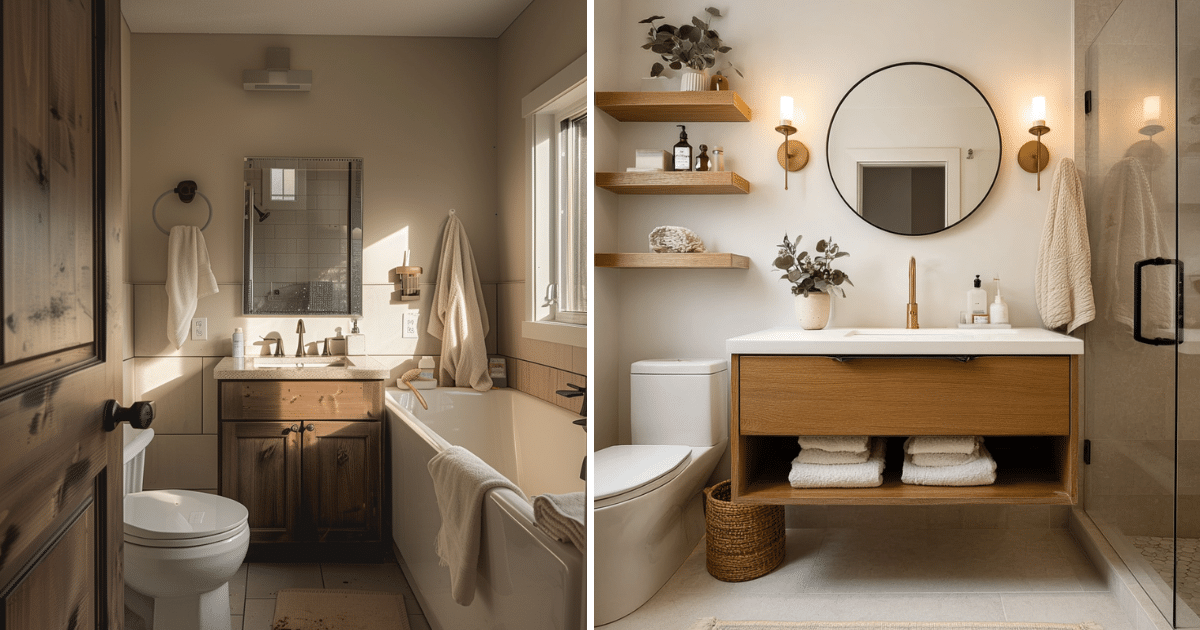
A small bathroom can feel overwhelming when the layout doesn’t work and the lighting feels heavy. I’ve seen it happen so many times bathrooms that technically have everything they need, yet still feel cramped and uninspiring. When I first walked into this space, it wasn’t terrible… but it definitely wasn’t working. The vanity felt too big, the walls were dull, and the lighting made everything look darker than it should.
This Small Bathroom Before and After transformation proves something important: you don’t need more square footage you need smarter design decisions. Instead of knocking down walls or spending thousands on plumbing changes, this makeover focused on layout, light, and scale.
In this Small Bathroom Before and After guide, I’ll show you exactly what changed, what made the biggest impact, and how you can apply these same ideas in your own home even on a budget.
Table of Contents
The Before
What Wasn’t Working
Before the transformation, the bathroom had several common small-space mistakes that made it feel even tighter than it was.
1. Poor Layout Flow
The vanity placement restricted movement. When the door opened, it almost collided with the cabinet edge. That awkward circulation immediately made the bathroom feel uncomfortable.
2. Oversized Vanity
The vanity was bulky and heavy. In small spaces, furniture scale is everything. This piece visually “ate up” the room.
3. Dark, Light-Absorbing Colors
The walls were painted in a muddy beige tone that absorbed natural light instead of reflecting it. Combined with darker cabinetry, the entire space felt closed in.
4. Insufficient Lighting
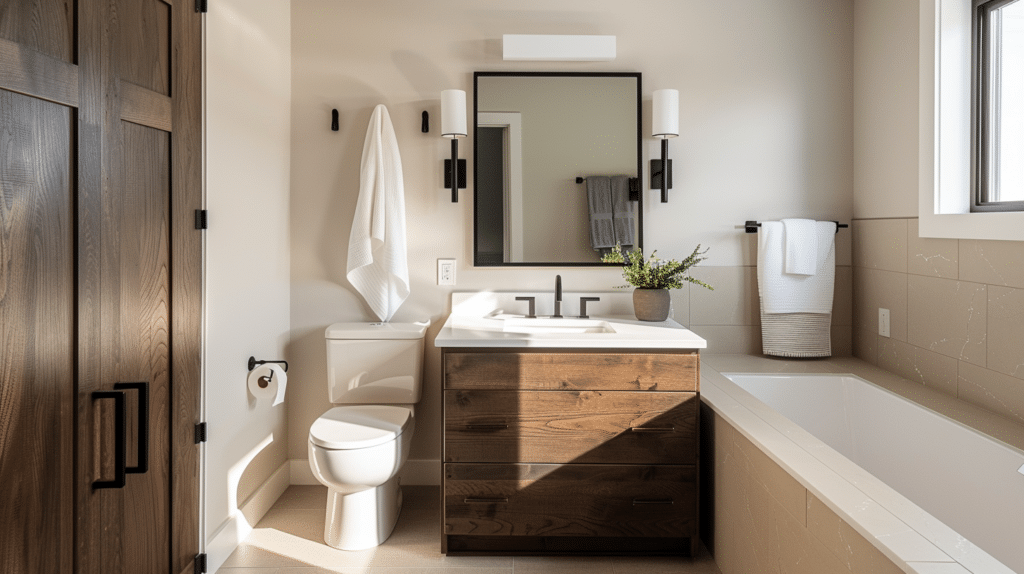
There was only one ceiling-mounted light fixture. It created shadows around the mirror and made daily routines frustrating.
5. Visible Clutter
With limited storage, products were left on the countertop. Even minimal clutter can double the visual chaos in a small bathroom.
At this stage of the Small Bathroom Before and After, the problem wasn’t size — it was design choices.
The Transformation Strategy
The Plan Behind the Makeover
Every successful Small Bathroom Before and After starts with intention. Instead of rushing to buy new decor or trendy tiles, this makeover began with a clear strategy. The goal wasn’t just to “refresh” the space — it was to solve the real problems that were making the bathroom feel small and uncomfortable.
1. Define the Design Goal
The main design goal was simple:
Make the bathroom feel brighter, lighter, and visually larger without moving plumbing.
By keeping the existing toilet and shower positions, we avoided major renovation costs. This Small Bathroom Before and After transformation focused on cosmetic and layout improvements rather than structural demolition.
2. Set a Realistic Budget
The budget target was under $1,500. That meant prioritizing changes that would deliver the biggest visual impact for the lowest cost.
Instead of replacing tiles or changing the flooring, we focused on:
- Paint
- Lighting upgrades
- A new vanity
- Storage improvements
- Strategic decor
In many Small Bathroom Before and After projects, smart budgeting matters more than expensive materials.
3. Prioritize High-Impact Changes
We asked one simple question:
What makes the space feel the smallest?
The answer:
- The bulky vanity
- The dark wall color
- The weak lighting
So those became the top priorities.
When you approach a Small Bathroom Before and After strategically, you remove what visually shrinks the room first.
4. Establish a Clear Style Direction
The chosen mood:
Soft modern with warm neutral tones.
This meant:
- Warm white walls
- Light wood or floating vanity
- Minimal black or brushed gold accents
- Clean lines
- Subtle decor
A clear direction prevents overdecorating which is one of the biggest mistakes in small bathrooms.
If you enjoyed this Small Bathroom Before and After makeover, you might also love these small kitchen before and after makeover ideas, where smart layout changes completely transformed a compact cooking space.
The After
What Changed
This is where the Small Bathroom Before and After truly comes to life. No walls were moved. No plumbing was relocated. Yet the space feels completely different lighter, calmer, and visually larger.
Let’s break it down.
1. Layout Improvements
The biggest change in this Small Bathroom Before and After was replacing the bulky floor-standing vanity with a floating vanity.
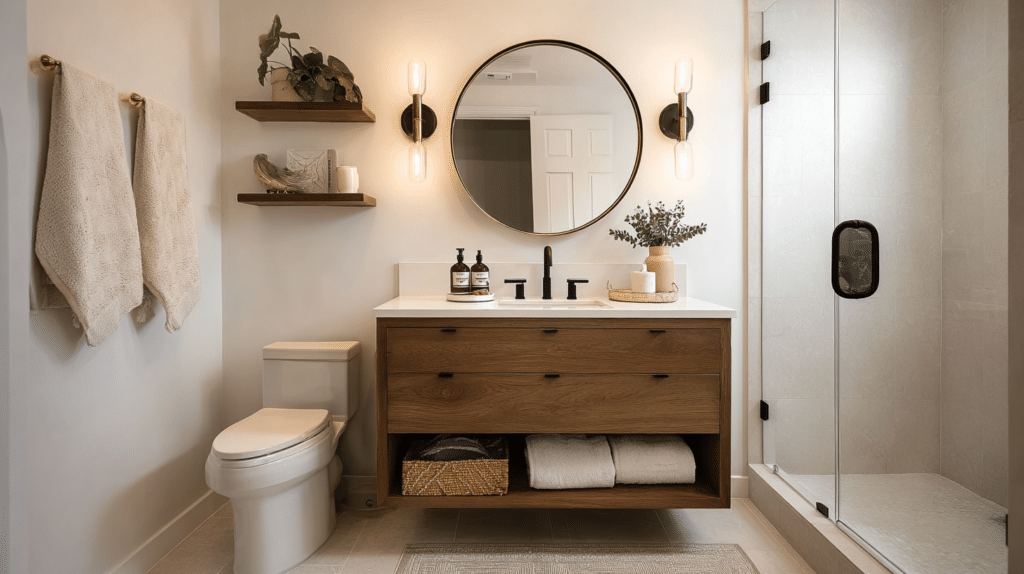
By lifting the cabinet off the ground:
- More floor became visible
- The room felt instantly more open
- Cleaning became easier
Even though the bathroom size didn’t change, the perception of space dramatically improved.
Small adjustments were also made to accessory placement. Towel hooks were repositioned to avoid visual crowding, and unnecessary wall items were removed. Better flow equals better comfort.
This part of the Small Bathroom Before and After proves that layout is everything.
2. Color & Lighting
Color alone transformed the energy of the room.
The dark beige walls were replaced with a soft warm white that reflects natural light beautifully. Light tones help walls visually recede, making the bathroom feel larger.
Lighting was layered instead of relying on a single overhead fixture.
Changes included:
- Two wall sconces beside the mirror
- A softer overhead ceiling light
- Brighter LED bulbs with warm temperature
The mirror area became functional and flattering. No more shadows. No more dim corners.
In this Small Bathroom Before and After, lighting was one of the most powerful upgrades.
3. Furniture Choices
Scale was carefully considered.
The new vanity is narrower but still practical. It offers storage without overpowering the room. A round mirror replaced the previous rectangular one, softening the visual lines and adding modern character.
Fixtures were updated to sleek matte black hardware, adding contrast without visual heaviness.
In a Small Bathroom Before and After transformation, every item must earn its place. Less bulk. More intention.
4. Storage Solutions
Storage was the silent hero of this makeover.
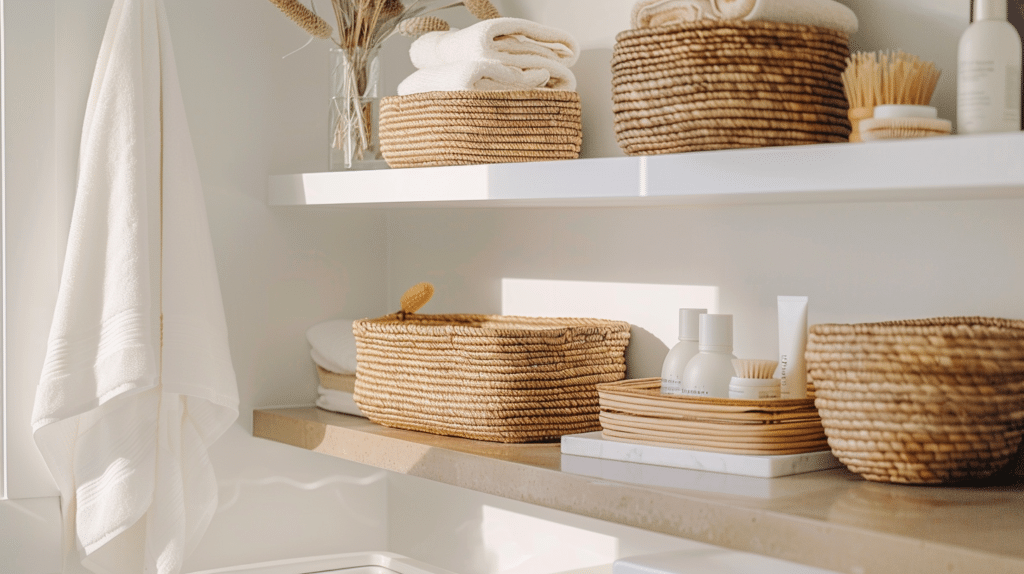
Smart additions included:
- Floating shelves above the toilet
- Drawer dividers inside the vanity
- Wall-mounted hooks instead of towel bars
- A small woven basket for daily essentials
By clearing the countertops, the bathroom instantly felt calmer and larger.
One key lesson from this Small Bathroom Before and After:
Clutter shrinks a space faster than dark paint.
Budget Breakdown
Estimated Budget Range
One of the most encouraging parts of this Small Bathroom Before and After transformation is that it stayed within a realistic budget. No luxury materials. No structural work. Just smart upgrades with maximum visual impact.
Here’s how the costs were distributed:
- Floating Vanity: $450
- Mirror: $150
- Wall Sconces & Lighting: $220
- Paint & Supplies: $80
- Floating Shelves & Storage Accessories: $200
- Hardware & Fixtures: $100
- Decor & Styling Elements: $150
Total Estimated Investment: $1,350
For a complete Small Bathroom Before and After transformation, this is considered a modest budget — especially given the dramatic difference in feel and function.
What Made the Biggest Impact?
Not all upgrades contribute equally. In this Small Bathroom Before and After, three changes delivered the highest return:
1. Paint ($80 – Highest Visual ROI)
The wall color shift from dark beige to warm white instantly expanded the room visually. For under $100, the bathroom looked twice as bright.
2. Lighting ($220 – Functional & Aesthetic Upgrade)
Layered lighting eliminated shadows and added depth. Good lighting doesn’t just brighten a space — it transforms how large it feels.
3. Floating Vanity ($450 – Space Illusion Effect)
This single change opened up visible floor space and modernized the entire room.
When planning your own Small Bathroom Before and After, focus first on upgrades that change perception, not just appearance.
Where We Saved Money
- No tile replacement
- No plumbing relocation
- No flooring changes
- No structural modifications
By keeping the layout intact and working with what was already there, this Small Bathroom Before and After stayed efficient and strategic.
Design Tips You Can Apply
5 Smart Lessons From This Makeover
Every successful Small Bathroom Before and After teaches practical lessons you can reuse. Whether your bathroom is tiny, narrow, or just poorly arranged, these principles work almost every time.
1. Start With Layout Before Buying Anything
In any Small Bathroom Before and After project, layout is the foundation.
Before choosing decor or paint colors, study how the room functions:
- Does the door block movement?
- Is the vanity oversized?
- Are accessories crowding the walls?
Sometimes simply removing or repositioning one item improves flow dramatically.
Small spaces respond beautifully to intentional design just like in this small studio apartment before and after transformation, where every square inch was maximized without major demolition.
2. Use Lighter Tones to Reflect Light
Light colors don’t just look clean they visually expand walls.
Soft whites, warm neutrals, pale gray, or light beige can make a dramatic difference. In this Small Bathroom Before and After, changing the wall color was one of the most affordable and impactful upgrades.
Dark tones can work but only in very balanced, well-lit spaces.
3. Avoid Oversized Pieces
Scale matters more than style in small spaces.
When choosing:
- Vanity
- Mirror
- Storage cabinets
- Light fixtures
Always prioritize proportion. A slim vanity with storage will outperform a bulky one every time in a Small Bathroom Before and After transformation.
4. Layer Your Lighting
One ceiling light is never enough.
Layer lighting with:
- Wall sconces
- Brighter LED bulbs
- Optional accent lighting
Lighting removes shadows, adds depth, and prevents the room from feeling flat.
Many Small Bathroom Before and After projects fail simply because lighting wasn’t addressed.
5. Choose Fewer, Better Decor Pieces
Overdecorating shrinks small spaces visually.
Instead of:
- Multiple small accessories
- Busy wall art
- Too many open shelves
Choose:
- One statement mirror
- Minimal hardware
- Clean styling
In this Small Bathroom Before and After, restraint created elegance.
Common Mistakes to Avoid
Even the most promising Small Bathroom Before and After project can fail if a few common mistakes aren’t avoided. Small spaces are less forgiving, which means every design decision carries more visual weight.
Many of the same layout mistakes we corrected here also appeared in this small bedroom before and after design tips, proving that scale and lighting matter in every room.
Here are the biggest errors to watch for:
1. Blocking Natural Light
Natural light is your greatest asset in a small bathroom. Heavy curtains, dark blinds, or bulky window treatments can instantly shrink the room.
Instead:
- Use sheer curtains
- Choose frosted glass for privacy
- Keep window areas visually clean
In many Small Bathroom Before and After projects, simply maximizing natural light makes a dramatic difference.
2. Choosing Bulky Furniture
Large vanities and oversized storage cabinets may offer functionality, but they overpower small rooms.
Before purchasing:
- Measure carefully
- Consider depth, not just width
- Opt for floating or slim-profile designs
One oversized piece can undo the entire Small Bathroom Before and After transformation.
3. Using Dark Paint Without Proper Lighting
Dark paint isn’t automatically bad — but in small bathrooms with limited lighting, it absorbs brightness and makes walls feel closer.
If you love darker shades:
- Balance with strong layered lighting
- Use reflective surfaces
- Keep flooring and ceilings light
Otherwise, lighter tones remain the safest strategy in a Small Bathroom Before and After.
4. Overdecorating the Space
Small bathrooms are not the place for excess styling.
Avoid:
- Too many open shelves
- Excess countertop items
- Busy patterns everywhere
Minimal styling keeps the room calm and spacious. In this Small Bathroom Before and After, reducing decor actually elevated the overall look.
5. Ignoring Storage Planning
Without proper storage, clutter returns quickly. Even the most beautiful Small Bathroom Before and After makeover will lose its impact if daily items pile up again.
Always plan:
- Drawer dividers
- Hidden baskets
- Wall-mounted storage
Smart storage protects your investment long term.
Final Thoughts
This Small Bathroom Before and After transformation proves something powerful: real change doesn’t require demolition it requires intention.
The square footage stayed the same. The plumbing stayed in place. The tiles weren’t replaced. Yet the result feels like a completely new space. Why? Because the focus shifted from “adding more” to “choosing better.”
In this Small Bathroom Before and After, the biggest improvements came from:
- Correcting the layout flow
- Replacing an oversized vanity
- Brightening the color palette
- Layering the lighting
- Reducing visible clutter
Small spaces respond beautifully to thoughtful design. When scale, light, and storage are handled correctly, even the smallest bathroom can feel calm, airy, and elevated.
If you’re planning your own Small Bathroom Before and After, remember this:
You don’t need a bigger room. You need smarter decisions.
If you’re redesigning multiple rooms, take inspiration from these small living room before and after ideas, which show how lighter tones and better furniture placement can open up tight layouts.
FAQ
How much does a small bathroom makeover cost?
A Small Bathroom Before and After makeover can cost anywhere between $800 and $5,000, depending on the scope of the project. Cosmetic upgrades like paint, lighting, and a new vanity are the most budget-friendly improvements. If plumbing, tiling, or flooring is replaced, costs increase significantly. In this Small Bathroom Before and After example, the total stayed around $1,350 by avoiding structural changes.
How do you make a small bathroom look bigger?
To make a bathroom feel larger in a Small Bathroom Before and After transformation, focus on:
Using light wall colors
Installing a floating vanity
Layering lighting sources
Keeping countertops clutter-free
Choosing mirrors that reflect light
Visible floor space and bright surfaces create the illusion of depth.
What colors work best in a small bathroom?
In most Small Bathroom Before and After projects, soft whites, warm neutrals, pale gray, and light beige work best. These colors reflect natural and artificial light, making walls appear farther away. If using darker tones, balance them with strong lighting and lighter accents.
Is a floating vanity worth it in a small bathroom?
Yes. In many Small Bathroom Before and After transformations, a floating vanity is one of the most effective upgrades. It exposes more floor space, improves visual flow, and gives the room a modern feel without increasing square footage.
What is the fastest way to update a small bathroom?
The fastest improvements in a Small Bathroom Before and After project are:
Repainting the walls
Updating lighting fixtures
Replacing hardware
Decluttering surfaces
These changes require minimal construction but deliver noticeable result
Browse my curated collection on Pinterest